Garage Door Opener Installation Guide
- COMMERCIAL GARAGE DOOR REPAIR
- GARAGE DOOR OPENER INSTALLATION
- GARAGE DOOR SPRING REPAIR
- SAME-DAY GARAGE DOOR REPAIR
- CUSTOM GARAGE DOOR
- GARAGE DOOR OPENER REPAIR
- GARAGE DOOR TRACK REPAIR
- GARAGE DOOR CABLE REPAIR
- GARAGE DOOR PANEL REPAIR
- LOCAL GARAGE DOOR REPAIR
- GARAGE DOOR REPLACEMENT
- NOISY GARAGE DOOR FIX
- GATE REPAIR
- GARAGE DOOR INSTALLATION
- GARAGE DOOR SECTION REPLACEMENT
- OVERHEAD GARAGE DOOR REPAIR
Garage Door Opener Installation: A Step-by-Step Guide
Getting Your Garage Door Automation Ready
Before jumping into the installation, it’s essential to get everything ready. Here’s how you can prepare effectively.
Gathering the Right Tools
Having the correct tools at hand will save you time and frustration. Here’s a quick checklist of items you’ll likely need:
- Screwdrivers ,flathead and Phillips
- Adjustable wrench
- Drill and drill bits
- Level
- Stepladder
- Socket set
- Pliers
Double-check the instruction manual of your specific opener model for any additional tools or items required.
Ensuring Safety First
Your safety is priority #1. Start by unplugging the garage door opener, if replacing an existing one)and ensure the door itself is closed. Always wear work gloves and safety goggles throughout the process. If you’re unsure about any part of the installation, consider reaching out to a
Step-by-Step Garage Door Opener Installation
With everything ready, let’s get started! Follow these steps for a smooth and easy installation.
Taking Out the Old Opener (If You Have One)
If you’re replacing an old opener:
- First, disconnect the power to stay safe—nobody wants surprises!
- Use your tools to detach the motor unit, rail, and door arm.
- Carefully remove any wiring connected to the old opener.
Keep your workspace tidy—store nuts, bolts, and screws in labeled containers so you can find them easily if you need them later.
Installing the New Rail and Motor
Now it’s time to assemble and install your new opener:
- Attach the rail to the motor unit, just like the manual shows.
- Mount the rail to the ceiling with brackets, making sure it’s nice and level.
- Secure the motor unit to the ceiling supports—double-check it’s sturdy!
Take your time to align the opener rail properly—it’ll make everything run smoothly later.
Setting Up the Safety Sensors
Modern openers come with safety sensors to help prevent accidents. Place the sensors on both sides of the garage door, about 6 inches off the ground. Wire them to the motor unit and test to make sure they’re lined up before moving forward.
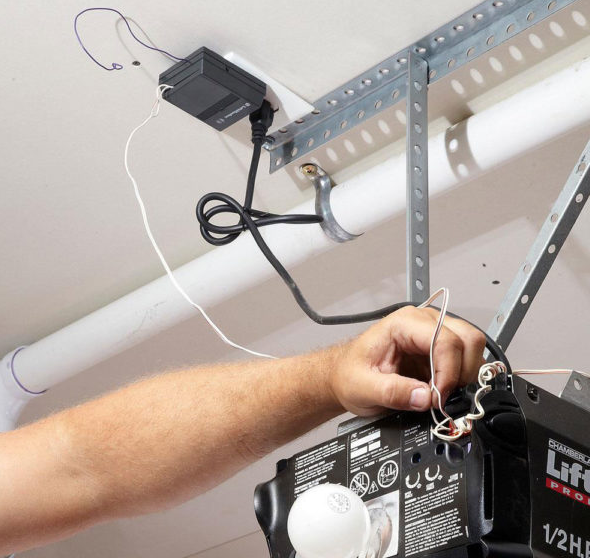
Attaching the Door Arm
Finally, connect the door arm to the garage door and attach it to the trolley on the rail. Tighten all screws and bolts so everything’s secure and ready to go.
And there you have it—a step closer to your fully functional garage door opener!
Final Adjustments and Testing
The hard work is done! Now it’s time to make a few final adjustments and test the opener.
Testing the Opener
Plug in the motor unit and press the remote to open and close the door. Observe the movement for any obstructions or unusual sounds. If anything seems off, stop and inspect the system.
Adjusting the Travel Limits
Use the adjustment screws on the motor unit to set the travel limits. Travel limits determine how far the door moves when opening or closing. Ensure the door fully closes and opens without overextending.
Troubleshooting Common Issues
If your garage door opener isn’t functioning properly, here are some common issues to check:
- Ensure the sensors are correctly aligned.
- Check for any loose wiring connections.
- Verify that the rail and motor are securely fastened.
Expert Garage Door Opener Installation with Delaware Garage Door Repair
Installing a garage door opener can be a rewarding DIY project, but sometimes you need the expertise of a professional to get it done right. At Delaware Garage Door Repair, we specialize in hassle-free garage door opener installations. If you’re looking for expert help, give us a call today and enjoy the peace of mind that comes with a professional installation done to perfection.